
In this tutorial you will learn how to set the Label and Autolabel in Nuke with Python
You can download all the files here:
Download Examples
Download Panel
Useful Links
- http://nuke.yellow-ant.net/tag/auto-label/
- http://herandhis.wordpress.com/category/cg-tools/nuke/
- http://www.comp-fu.com/2014/07/nuke-autolabel-magic/
Overview
- LABEL
Let's start by creating a node, for example a Blur node.
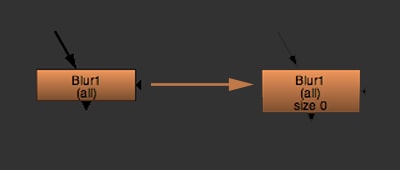
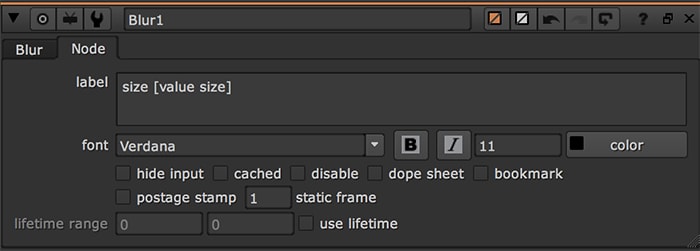
If you want to modify the Label, open the node Properties, go to the Node tab and insert this string in the Label knob.
size [value size]
This is the result:
- AUTOLABEL
In Nuke, there is a hidden knob called Autolabel. You can modify the Autolabel with Python easily.
Let's take the same Blur node again. In this case we want to remove the text (All) from the node, so open the Script Editor and execute this code:
nuke.toNode('Blur1')['autolabel'].setValue("nuke.thisNode().name()")
Otherwise, select the node and execute this other code. The result will be the same.
nuke.selectedNode()['autolabel'].setValue("nuke.thisNode().name()")
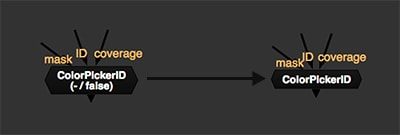
You can use this code on several nodes at once. Just select them and execute this code:
n = nuke.selectedNodes()
for p in n:
    p['autolabel'].setValue("nuke.thisNode().name()")
Python Panel
In this case you can create a panel where you insert the label directly, without opening the node Properties. In the second example you can modify the Autolabel.
#Label - Python panel
label = nuke.getInput('Change label', 'new label')
if label:
    for n in nuke.selectedNodes():
        n['label'].setValue(label)
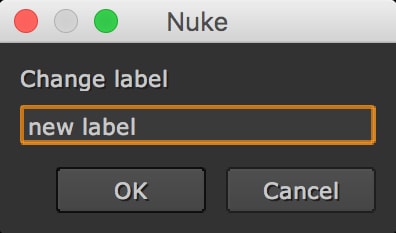
#Autolabel - Python panel
autolabel = nuke.getInput('Change autolabel', 'new autolabel')
if autolabel:
    for n in nuke.selectedNodes():
        n['autolabel'].setValue("nuke.thisNode().name() + \"\\n\" +  '(' + autolabel + ')' ")
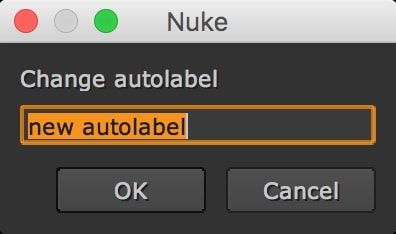
EXAMPLES
Download Examples- 1. Set the Autolabel equal to the name of the selected node
Usually when you create a Gizmo with a Pulldown Choice menu, it is added automatically to the Autolabel of the node. In this case you can reset the Autolabel, keeping only the name of the node.
#Select any node
n = nuke.selectedNode()
n['autolabel'].setValue("nuke.thisNode().name()")
- 2. Add value of knob "white" to the Autolabel in the Grade node
#Select Grade nodes
n = nuke.selectedNodes()
for p in n:
    p['autolabel'].setValue("nuke.thisNode().name() + \"\\n\" + '(' + str(nuke.thisNode()['white'].value()) + ')' ")
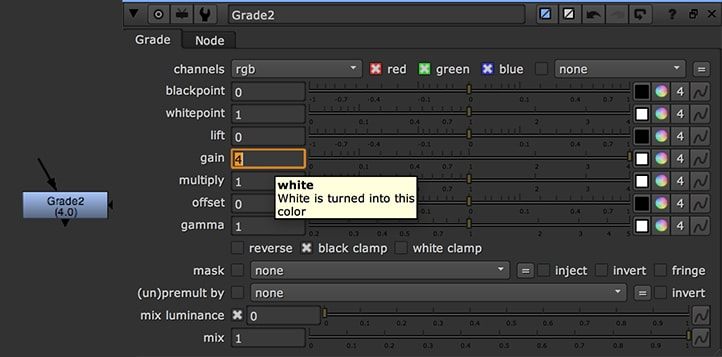
- 3. Add value of knob "filter" to the Autolabel in the Blur node
#Select Blur nodes
n = nuke.selectedNodes()
for p in n:
    p['autolabel'].setValue("nuke.thisNode().name() + \"\\n\" + '(' + nuke.thisNode()['filter'].value() + ')' ")
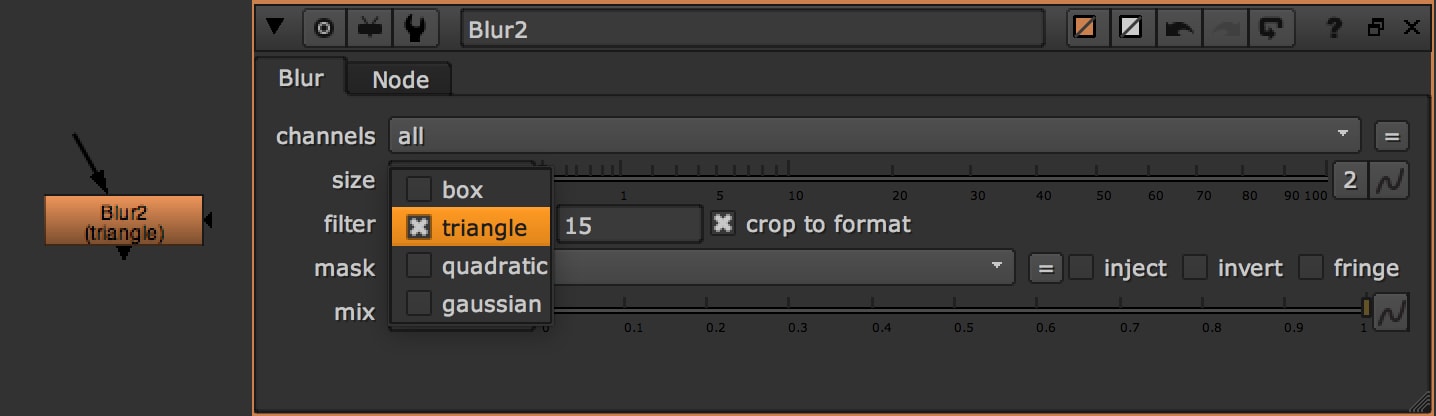
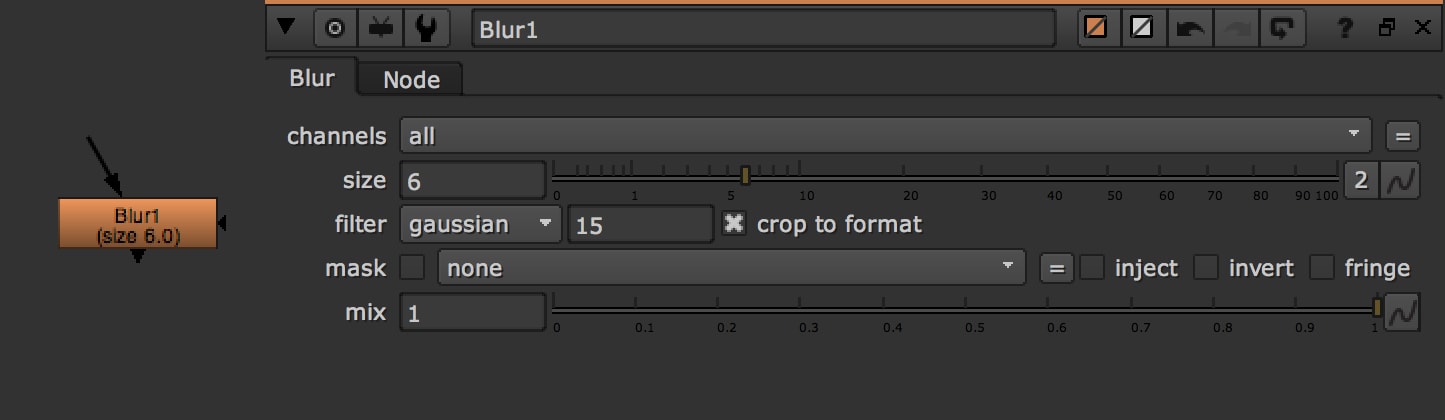
- 4. Add value and name of knob "size" to the Autolabel in the Blur node
#Try this with a Blur Node and print it out the name of the knob and the relative value
n = nuke.selectedNodes()
for p in n:
    p['autolabel'].setValue("nuke.thisNode().name() + \"\\n\" + '(' + str(nuke.thisNode()['size'].name()) + ' '  + str(nuke.thisNode()['size'].value()) + ')' ")
- 5. Customize Autolabel with If...else... condition
In this case, I'm going to check the value of the gain (actually the name of the knob is 'white'). If the value is > 1, then Autolabel will be 'lighter', otherwise it will be 'darker'.
#Try this with the Grade node 'Grade1'
autoLabel = "nuke.thisNode().name() + (' lighter' if nuke.thisNode()['white'].value()>1 else ' darker')"
nuke.toNode("Grade1")['autolabel'].setValue(autoLabel)
- 6. add Autolabel
With addAutolabel, you can add an Autolabel every time you create a node of the same Class. In this example, every time we create a Transform node, you will see the Autolabel. If the scale is > 1 it will print 'big', and if it is < 1 it will print 'small'.
Here you can read more information http://learn.foundry.com/nuke/developers/63/pythondevguide/callbacks.html
#When you create a Transform node, every time you will see this autolabel
def TransformLabel():
    n = nuke.thisNode()
    if n.Class() == "Transform":
        autoLabel = n.name() + (' big' if n['scale'].value()>1 else ' small')
        if n['label'].value():
            autoLabel = autoLabel + '\n' + str(n['scale'].value())
        return autoLabel

nuke.addAutolabel(TransformLabel)
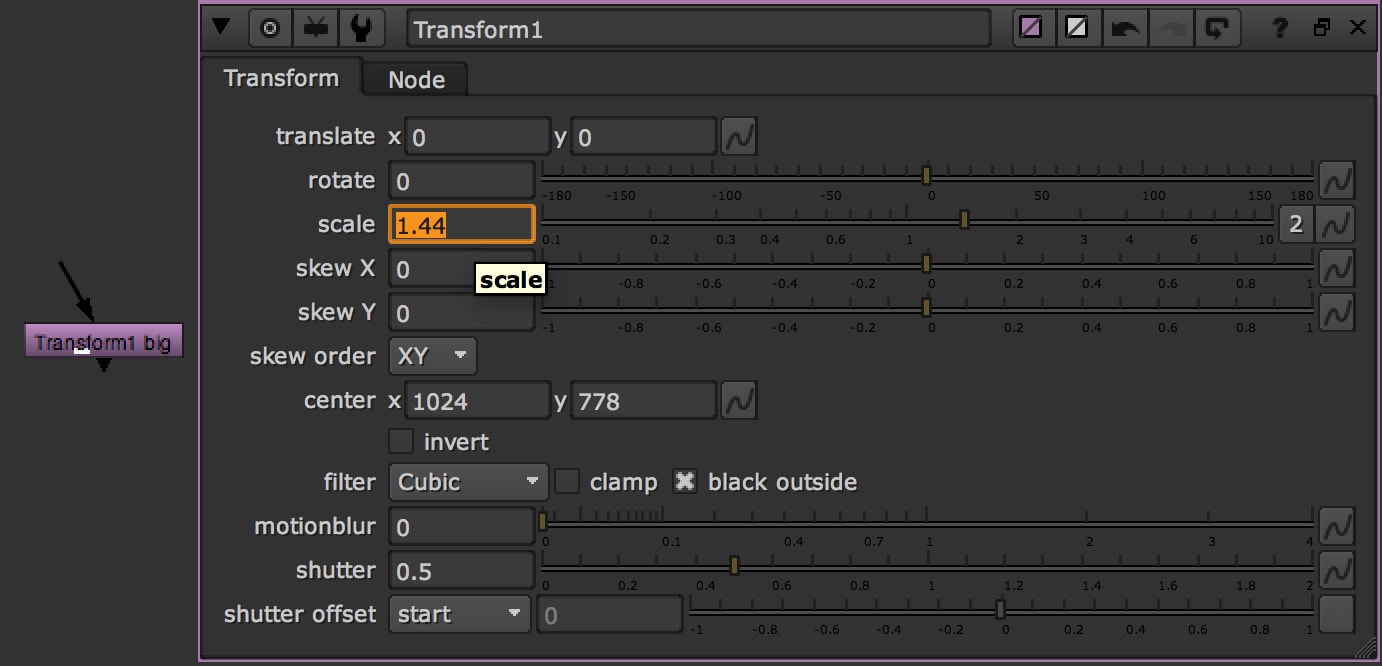
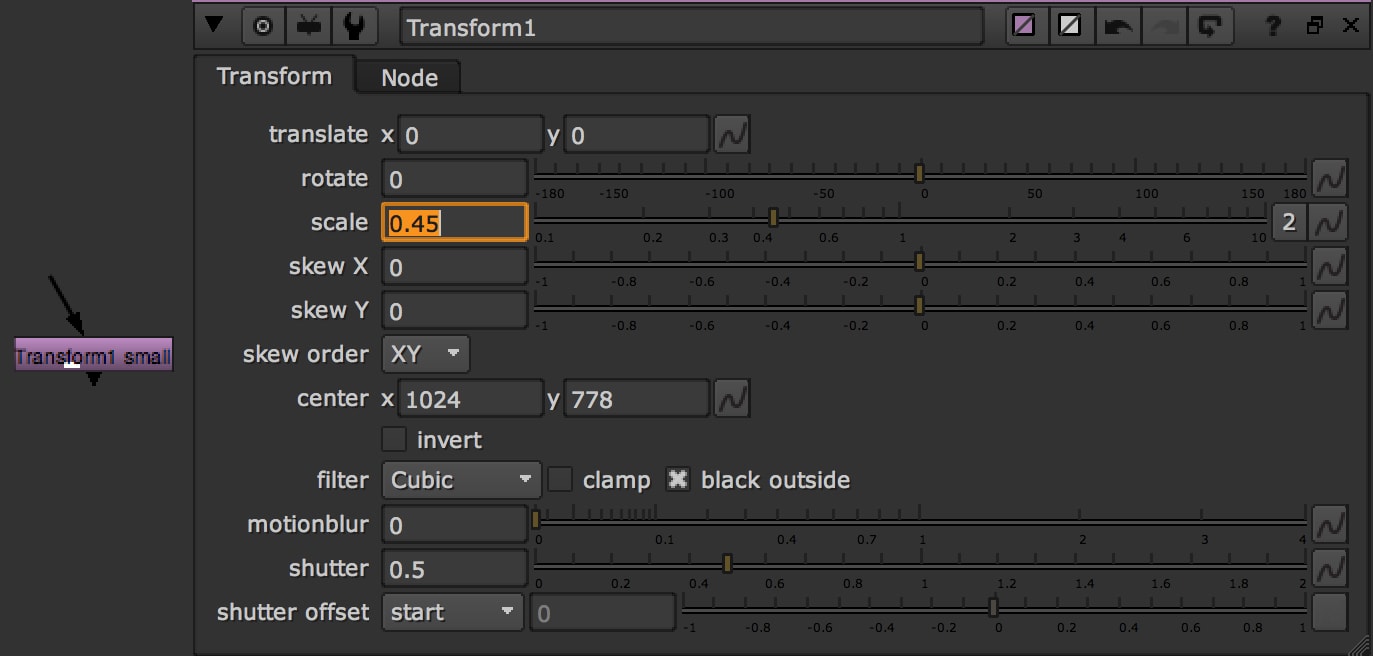
You can insert this function in your menu.py (or any Python module that is imported). You can have multiple autolabel handlers so you don’t need to cover all node classes in one function.
CUSTOM PANEL
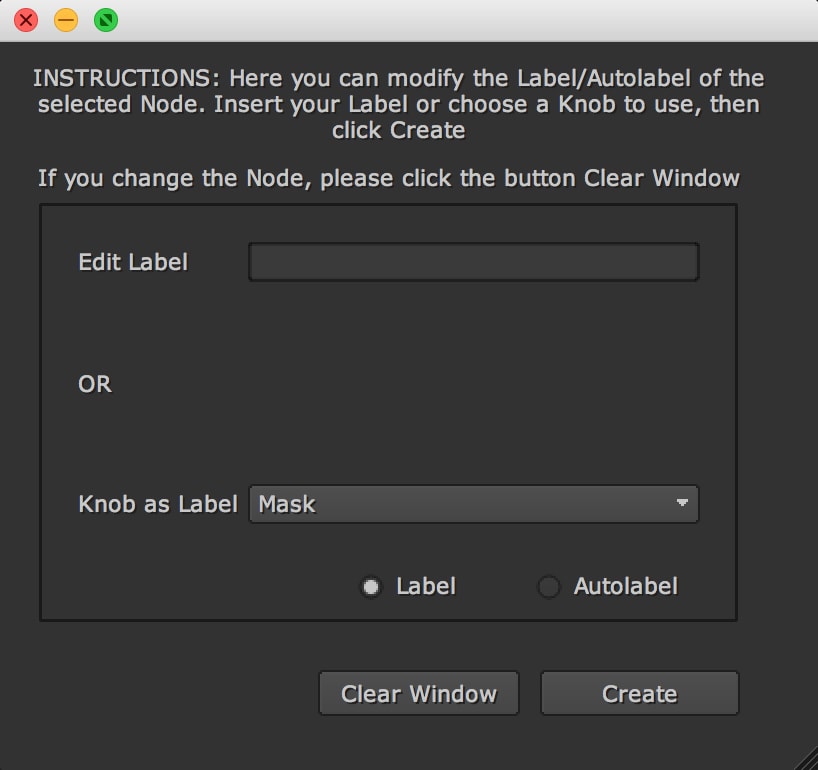
In this example you can change Label and/or Autolabel of your selected node with this Custom Panel in Qt.py. If you want more information about this topic, please visit these pages:
- http://www.nukepedia.com/prepare-for-qt5
- https://fredrikaverpil.github.io/2016/07/25/developing-with-qt-py/
- https://learn.foundry.com/nuke/developers/63/pythondevguide/custom_panels.html
Please download the zip file, unzip it and find the Qt.py file. The easiest way to install this file is to place the file manually:
Windows: C:\Program Files\Nuke10.0v1\lib\site-packages
Linux: /usr/local/Nuke10.0v1/lib/python2.7/site-packages
macOS: /Applications/Nuke10.0v2/Nuke10.0v2.app/Contents/Frameworks/Python.framework/Versions/2.7/lib/python2.7/site-packages
You will also find 2 other files: interface.ui and Change_Label_Autolabel.py. Place these files on your Desktop, for example, and insert the correct path in the file Change_Label_Autolabel.py
#insert the path where you can find the file interface.ui
file_interface = os.path.join("/Users/myName/Desktop/", "interface.ui")
Ok, perfect! Open Nuke, select a node and run the file Change_Label_Autolabel.py in the Script Editor.
import os
import io
#please, insert file Qt.py in this folder:
#Windows: C:\Program Files\Nuke10.0v1\lib\site-packages
#Linux: /usr/local/Nuke10.0v1/lib/python2.7/site-packages
#macOS: /Applications/Nuke10.0v2/Nuke10.0v2.app/Contents/Frameworks/Python.framework/Versions/2.7/lib/python2.7/site-packages

#Guide: fredrikaverpil.github.io/2016/07/25/developing-with-qt-py/
#nukepedia.com/prepare-for-qt5

from Qt import QtWidgets
from Qt import QtCompat
from Qt import QtGui


#insert the path where you can find the file interface.ui
file_interface = os.path.join("/Users/myName/Desktop/", "interface.ui")


#create the list of the knobs of the selected node
list = []
def create_list_knobs():

    del list[:]
    global node
    node = nuke.selectedNode()
    for knob in node.knobs().values():
        if (knob.label()!= "INVISIBLE" and knob.label()!= "panel dropped state"):
            if(knob.label()!=""):
                #list.append(knob.label() + " - " + knob.name())
                list.append(knob.name())
            else:
                list.append(knob.name())

    #order of the list
    list.sort()

create_list_knobs()


#------------------------------------------------------------------------------

class MyWindow(QtWidgets.QMainWindow):
    def __init__(self, parent=None):
        super(MyWindow, self).__init__(parent)
        self.main_widget = QtCompat.loadUi(file_interface)
        self.setCentralWidget(self.main_widget)
        self.load_ui()

    def load_ui(self):
        self.menu = self.main_widget.findChild(QtWidgets.QComboBox, "knob_ComboBox")
        self.menu.addItems(list)
        self.input = self.main_widget.findChild(QtWidgets.QLineEdit, "input_Text")
        self.label = self.main_widget.findChild(QtWidgets.QRadioButton, "label_radioButton")
        self.autolabel = self.main_widget.findChild(QtWidgets.QRadioButton, "autolabel_radioButton")
        self.button = self.main_widget.findChild(QtWidgets.QPushButton, "create_Button")
        self.button.clicked.connect(self.check_values)

        self.clear = self.main_widget.findChild(QtWidgets.QPushButton, "clear_Button")
        self.clear.clicked.connect(clear)

#HOW TO READ OR INTERACT WITH ELEMENTS IN THE PANEL
#QPushButton clicked
#button.clicked.connect(...)

#print QComboBox
#print self.menu.currentText()

#print QLineEdit
#print self.input.text()

    def check_values(self):
        if (self.label.isChecked()):
            knob = "label"
        else:
            knob = "autolabel"

        if (self.input.text() == "" and knob == "label"):
            value = "[value " + self.menu.currentText() + "]"
            node[knob].setValue(value)
        elif (self.input.text() == "" and knob == "autolabel"):
            value = self.menu.currentText()
            node['autolabel'].setValue("nuke.thisNode().name() + \"\\n\" + '(' + '" + value + "' + ' ' + str(nuke.thisNode()['" + value + "'].value()) + ')' ")
        elif (self.input.text() is not "" and knob == "autolabel"):
            value = self.input.text()
            node['autolabel'].setValue("nuke.thisNode().name() + \"\\n\" + '(' + '" + value + "' + ')' ")
        elif (self.input.text() is not "" and knob == "label"):
            value = self.input.text()
            node[knob].setValue(value)

#-----------------------------------------------------------------------

def show_window():
    global my_window
    my_window = MyWindow()
    my_window.show()

#clear the window
def clear():
    create_list_knobs()
    my_window.close()
    show_window()

show_window()
Insert the text that you want or select a knob. Choose if you want to add this new element to the Label or Autolabel and press Create.
If you change the selected node or if you want to reset the Panel, please click the Clear Window button